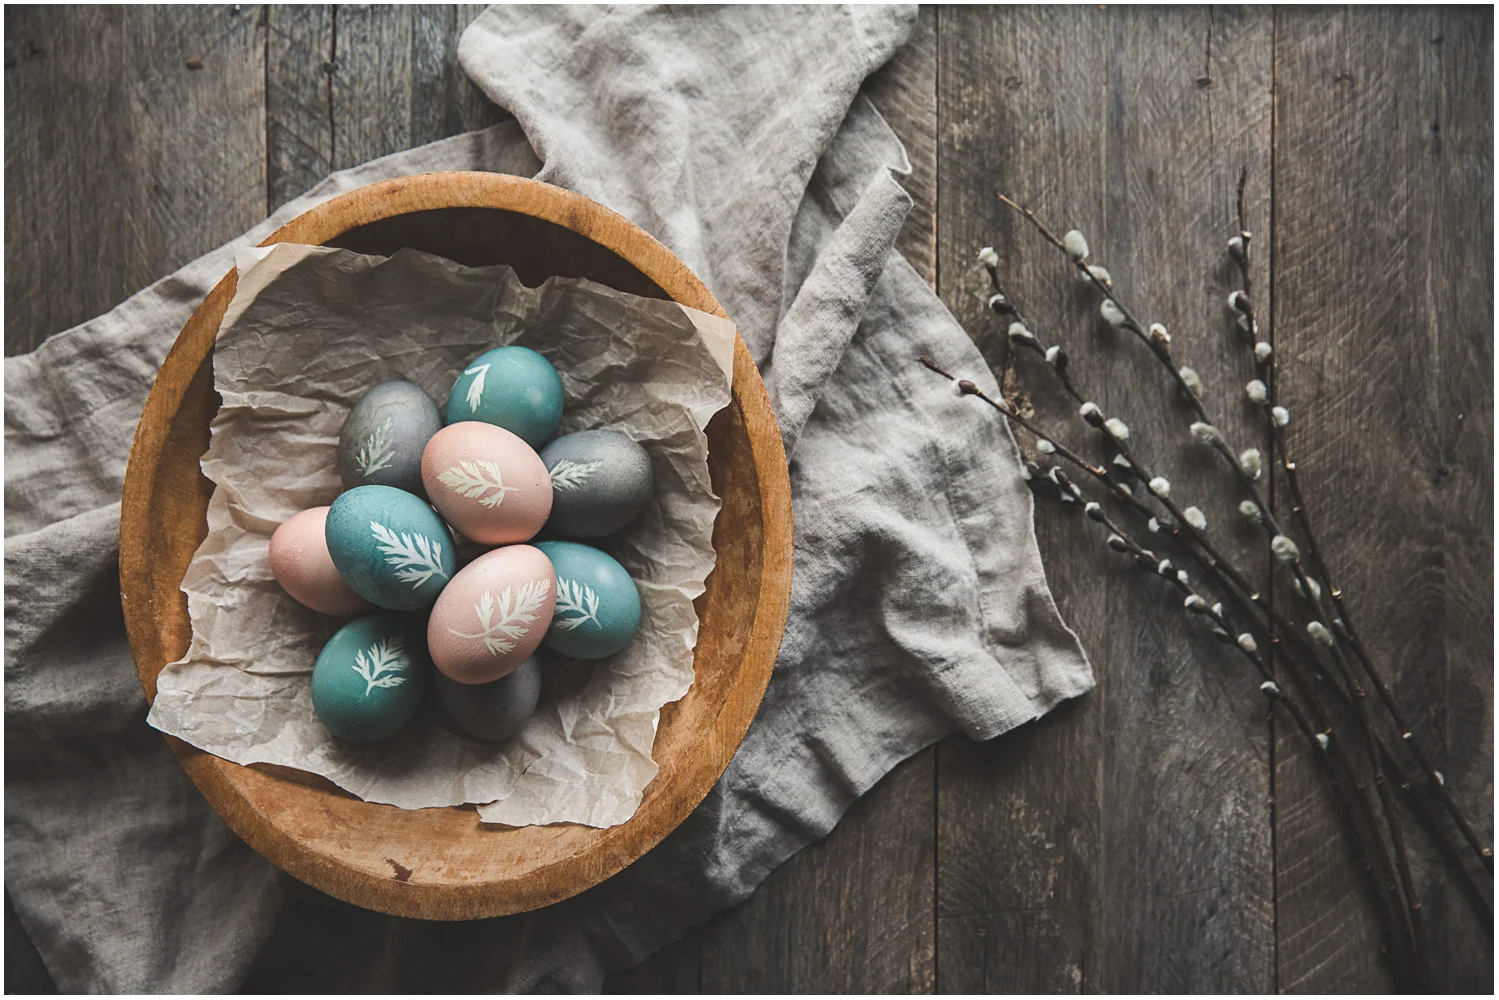
Decorating Easter eggs has never really been my thing. I remember enjoying the process as a kid, but I never really liked the end product. I wasn't especially impressed with what I was able to create and I didn't even get excited when we had stickers to put on the eggs. The whole thing just didn't really appeal to me. But this week I fell down a surprising internet rabbit hole (aren't they always surprising? You just never know where you'll end up.) and came out on the other side feeling all fired up to do things like dye my own fabric using plants. (Inspiration came from @kimothyd and Rebecca Desnos.) This has never had any appeal to me whatsoever, but one thing lead to another and suddenly I'm all fired up. Combine that with a discovery of these beautiful eggs and then some dyed using blueberries by Tinka @tinkaswelt and I was off on a project.
I've had ideas for testing out natural dyes for eggs before and even saved a few pins but never thought it would be worth the effort. I had very low expectations for this whole thing. I didn't really think the eggs would turn out as well as they did with relatively low effort, but I just wanted to try it, even if just to say that I did. To my surprise, it was both easy to do (though stinky - boiling cabbage is not a scent that I would want made into a candle) and produced great results. I followed the instructions by Marble Mount Homestead and they were excellent. I modified only slightly by using just half a red cabbage and a smaller pot, as I was only putting 4 of my dozen eggs in the cabbage water.

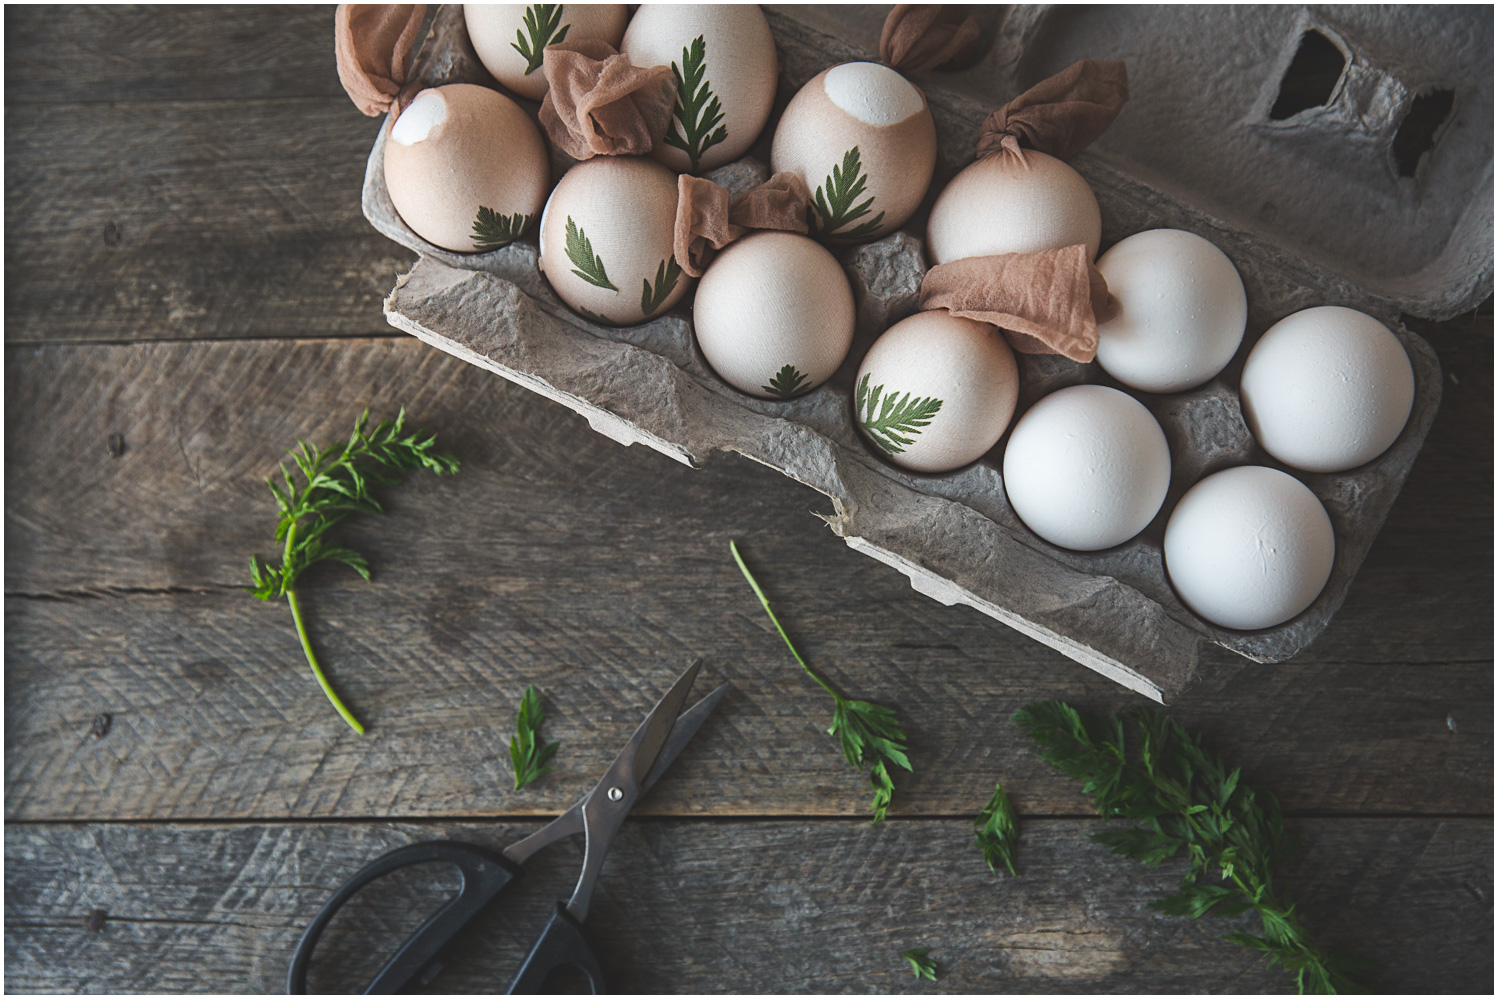
Eggs, prepped and ready for their dye bath

Supplies:
- Eggs, white if you have them, but brown will work fine too
- Red cabbage - for the dark aqua color
- Avocado - for the soft pink/blush color - eat the avocado, save the pit and skins for dyeing
- Blueberries - for the gray/blue color (I used frozen)
- Some kind of small leaves - I used the tops of a bunch of carrots but any herbs, leaves, ferns will work
- Pantyhose, cut into 2-3 inch strips to wrap the eggs
- Distilled white vinegar
Ready for dye
Method:
For each of your dye baths, you're going to simmer the dye materials for an hour before adding your eggs. This is a stinky business, but worth it. Since I was only putting 4 eggs into each dye bath, I used 6 cups of water in 3 separate pots and added 1/2 of a chopped up red cabbage to one, avocado stone, cut in half, and skins to another, and 1/4 c. frozen blueberries to another. Bring the pots to a boil, then cover, and let simmer for an hour. While those are boiling, prep your eggs. It's not as hard as it may seem at first glance. Place a leaf smooth side down on the egg and gently wrap a section of hose around the egg. I recommend covering the whole egg - I didn't on some of mine and you can tell when they are done. Tie the hose in a knot secure enough to hold the plant in place, but not so tight you crack the egg. When the dyes are done simmering, remove the fruits and veggies from the pots, discard, add a splash of vinegar, and very carefully place your eggs in. Bring to boil, then turn off the heat, and let sit for about 15 min. This will hard cook your eggs. Now it's up to you how long you want to leave them in the dye bath. After an hour, they will have very light color. I left mine in the dye bath in the refrigerator overnight. I did gently place them into sealable plastic tubs for this, as I needed the pots and they wouldn't all fit in the fridge anyway. The next morning, I took them out of the dye bath, snipped off the hose, and voila!
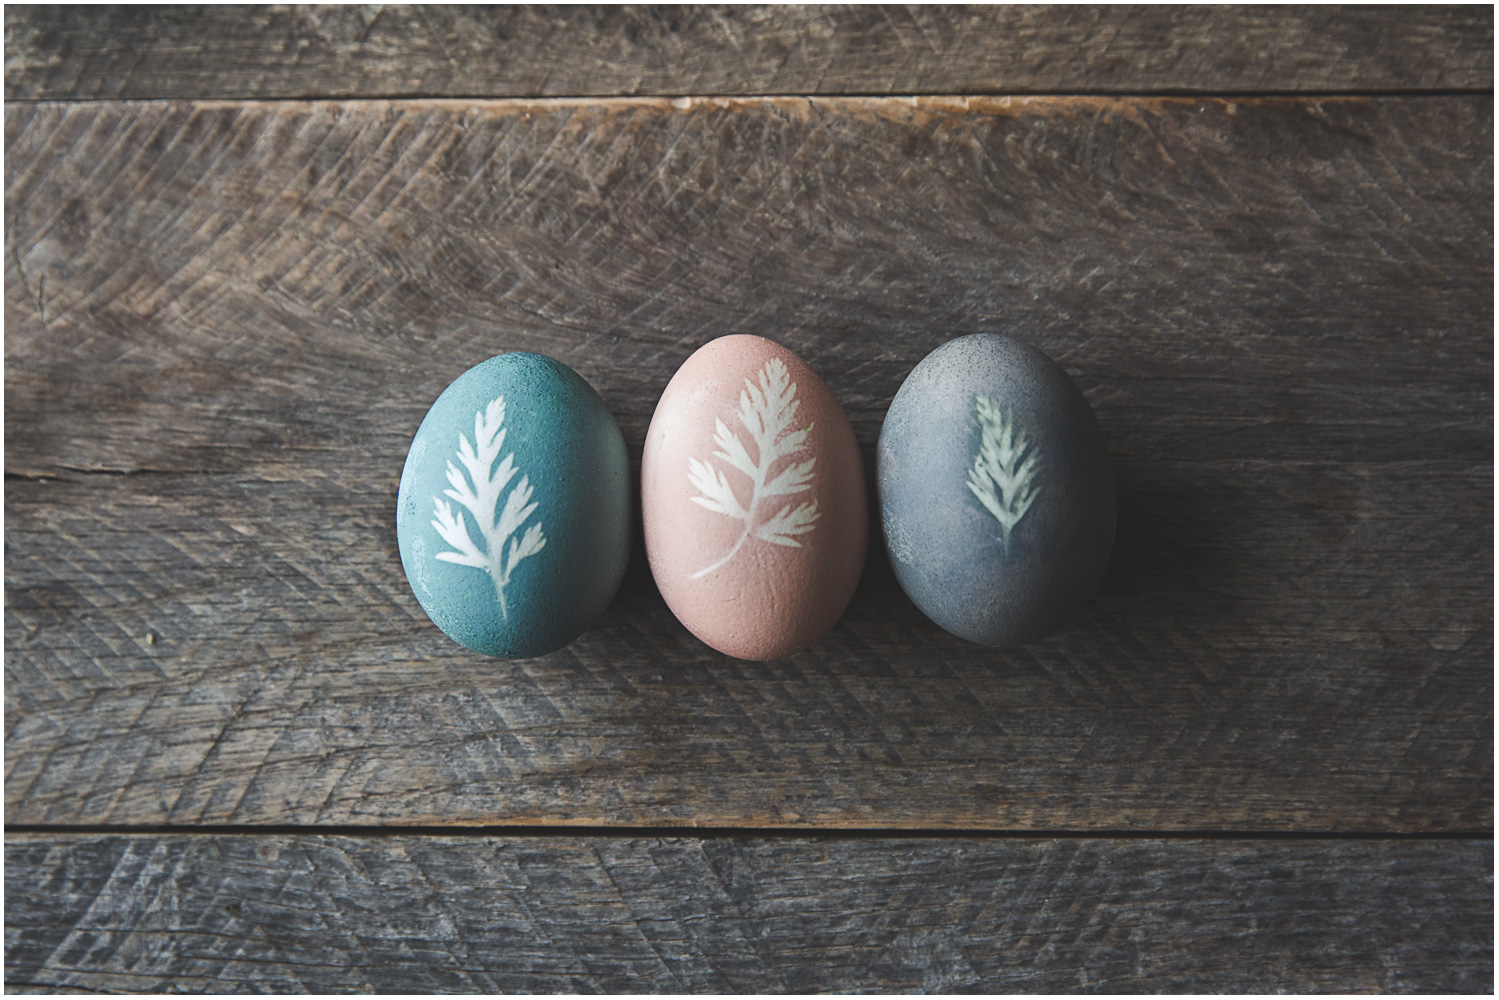
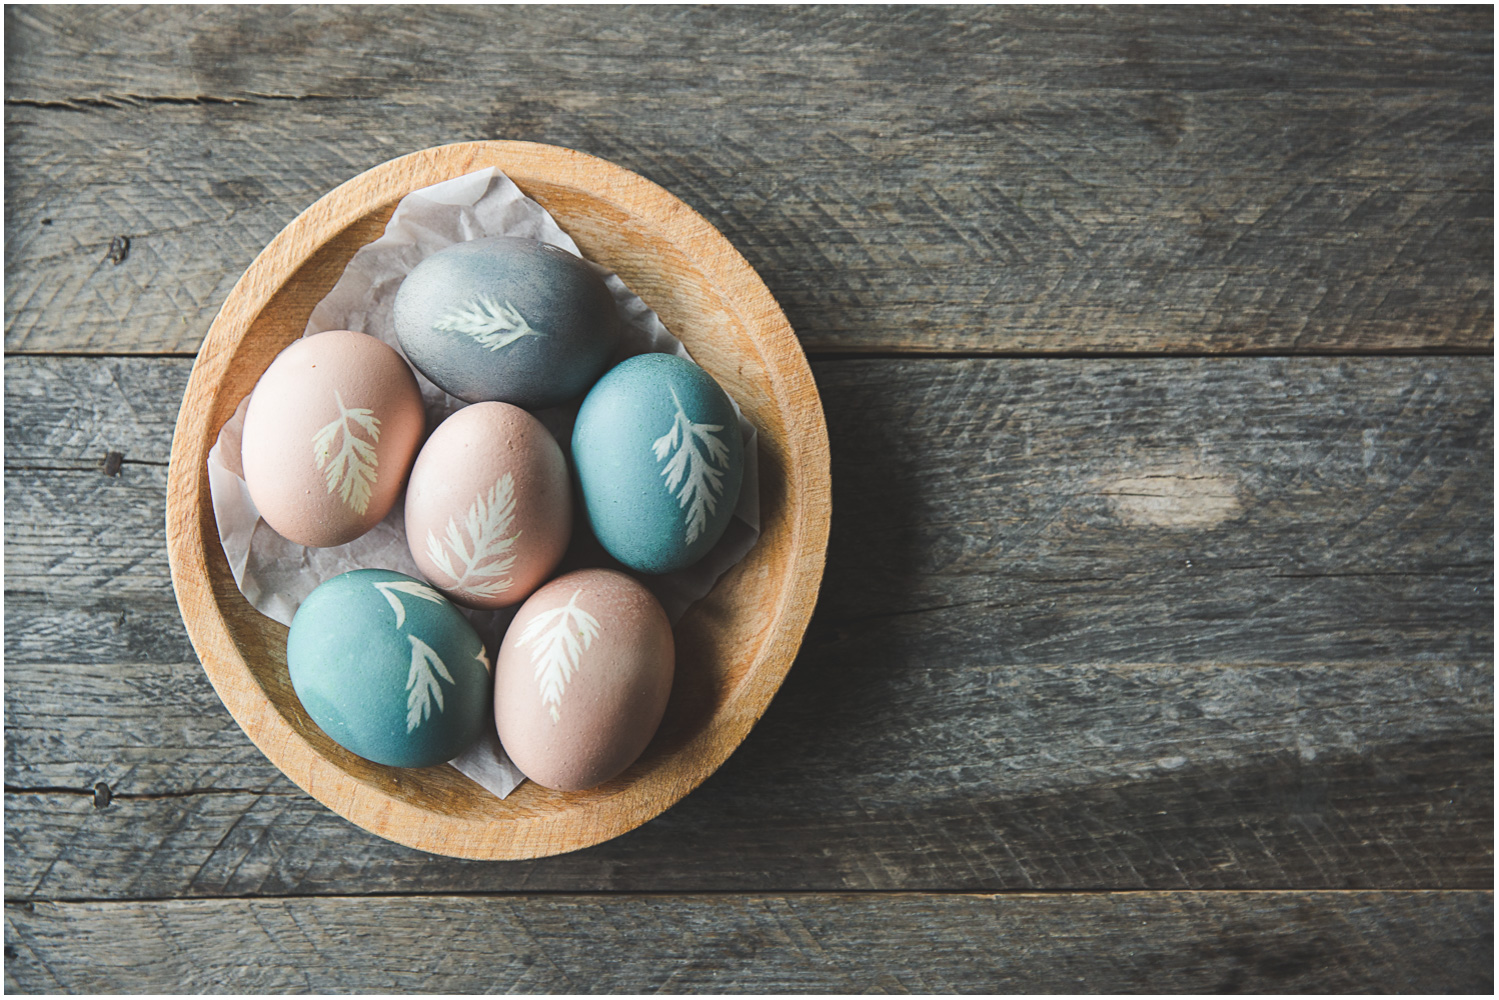
Eggs dyed with red cabbage, avocado, and blueberries
A few tips:
- Make sure the hose is tight enough to securely hold the leaf while the egg gets jostled. Otherwise, the design won't be quite as crisp when you're done.
- Placing the leaf smooth side down helps it to stay stuck tightly to the egg so you get crisper edges
- If the eggs are in a small container in the fridge and touching each other and the sides, you might have some light spots in the color. Make sure the eggs have plenty of space if you don't want that to happen.
This turned out to be fun and rewarding, and has renewed my interest in dyeing Easter eggs. There are many other items you can use to get a full rainbow spectrum if you are interested. I think I'm hooked and will try it again next year.


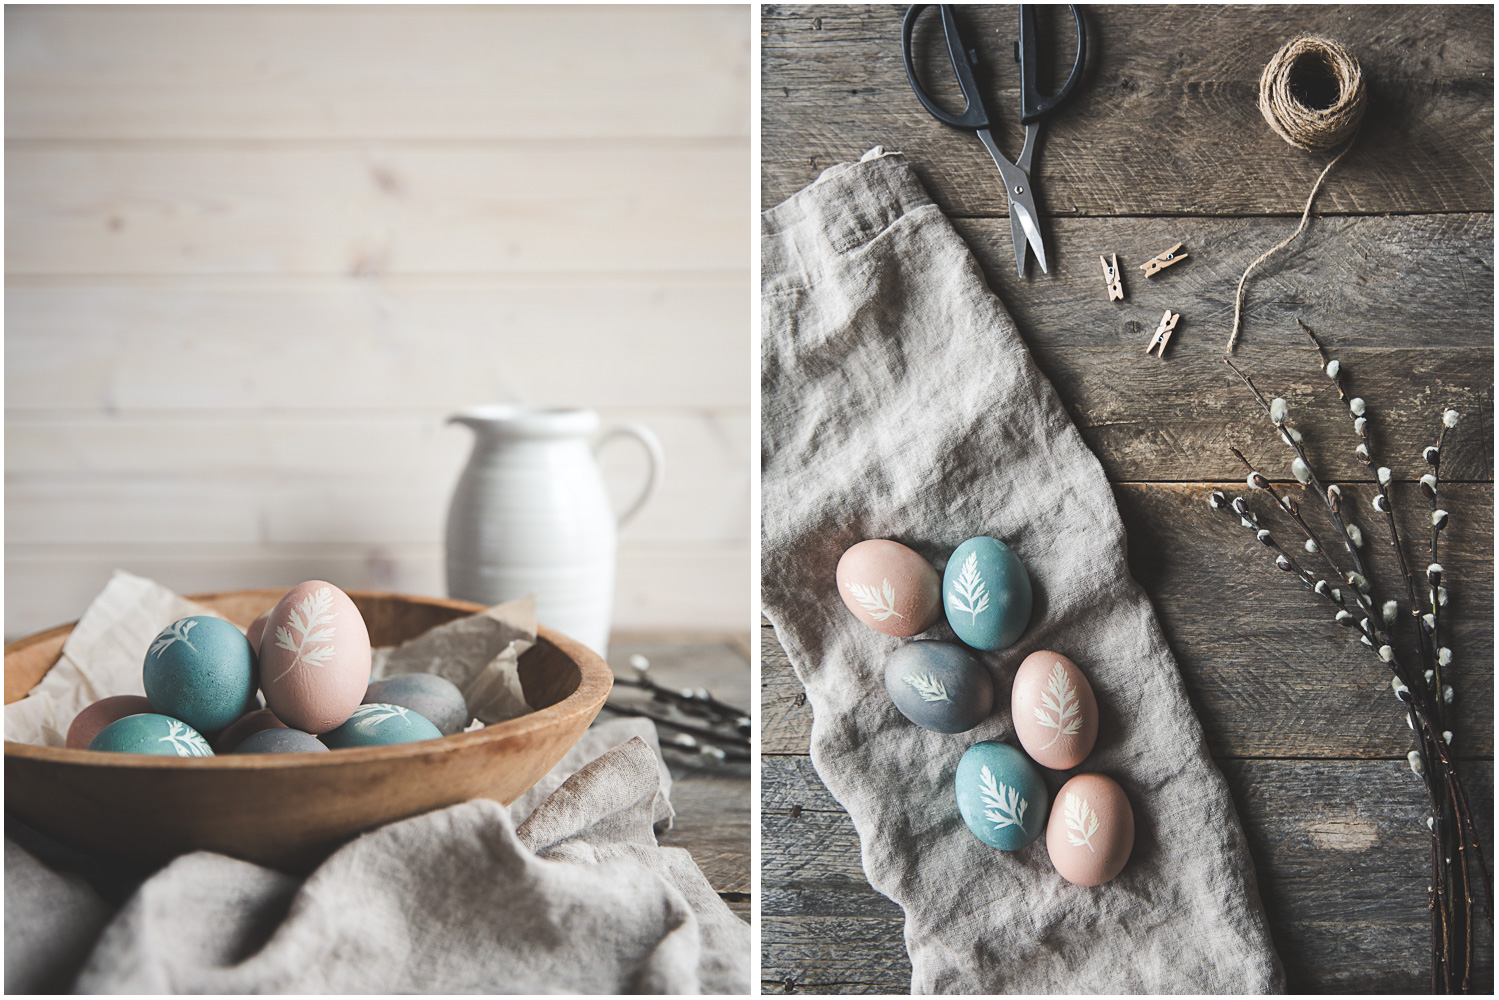
Hope you have a wonderful Easter weekend and let me know if you try dyeing some eggs!
Enjoy!
-KB