• Free Resources
  • About
  • Gallery
  • Styled Life Retreat
  • Blog
Menu

Kate Bragg

Street Address
City, State, Zip
Phone Number
Photography | Styling | Seasonal Living

Your Custom Text Here

Kate Bragg

  • Free Resources
  • About
  • Gallery
  • Styled Life Retreat
  • Blog
Bragg_Kate_Photographing_Summer-0134.jpg

Blog

Favorite seasonal recipes, projects, and some photography advice and inspiration.

Freshly Cut Lilacs

June 5, 2016 Kate Bragg
Freshly cut lilacs

Freshly cut lilacs

I adore the fresh scent of cut lilacs in the house.  Their smell is light and floral, filling the house with the scent of early summer.  Cut lilacs don't last long but I have found that gently smashing the cut stems will help them to soak up more water, and putting them into cool water immediately after cutting helps maintain their freshness.  I can remember snipping a small bouquet of lilacs to take to my elementary school teachers and wrapping them in damp paper towels so that they would survive the bus ride to school.  I love lilacs so much that for my wedding, my aunt cut lilacs in late May and kept them alive and fresh until mid-June.  She has incredible skill with flowers and I hope to learn as much as I can from her.  For now, I am enjoying some of the last blooms of the season and looking forward to planting more lilac bushes to enjoy in future years. 

Bragg_Kate_Lilac_Bright_Horizontal_02.jpg
Bragg_Kate_Lilac_Bright_Diptych_01.jpg
Bragg_Kate_Lilac_Bright_Horizontal_03.jpg
Bragg_Kate_Lilac_Bright_Diptych.jpg

Enjoy! - KB

In Still Life Tags Lilacs, Still Life

Lilacs in Bloom

May 31, 2016 Kate Bragg
Cut lilacs with tea

Cut lilacs with tea

I forgot how fresh and uplifting spring and early summer are, here in the great state of Maine.  I forgot how beautiful and bountiful the lilacs can be, how sweet and light the apple blossoms are, how quintessential it is to see lupine in bloom all along the highways.  I've been captivated by the blooming lilacs, their fresh scent in the breeze all over town, and have been photographing them relentlessly for the last week. 

Today I'm sharing a handful of images from my recent lilac photography binge.  I've been admiring them by the old houses and barns that I so adore, especially on the kinds of cloudy days that I love, as well the bunches that I've brought inside to fill the house with their decidedly spring-y fresh scent.  Their peak bloom only lasts about a week so I am soaking it up as much as I can.  I hope you are too! 

Bragg_Kate_Lilac_Barn_Diptych.jpg
Bragg_Kate_Lilac.jpg
Bragg_Kate_Lilac_Barn_Diptych2.jpg
Bragg_Kate_Lilac_Door_Diptych.jpg
Bragg_Kate_Lilac_Indoor.jpg
Bragg_Kate_Lilac_Indoor_Freelens.jpg
Bragg_Kate_Lilac_Indoor_Freelens_2.jpg
Bragg_Kate_Lilac_Indoor_Vase_Diptych.jpg

Enjoy! - KB

In Still Life Tags Lilacs
2 Comments

Fluffy White Cake with Maple Frosting

May 8, 2016 Kate Bragg
Fluffy White Cake with Maple Frosting

Fluffy White Cake with Maple Frosting

Yes, I know it's May, but spring seems to be taking its sweet time arriving in the Northeast.  We have had dreary, drizzly, cold weather lately and it put me in the mood for maple instead of flavors more reminiscent of spring. 

My grandmother has always made a white cake with maple walnut frosting, which is what inspired me to make this cake, sans walnuts, courtesy of my 1960 edition of Betty Crocker's Cookbook.  (The cookbook belonged to my great-grandmother and is one of my favorite possessions.)  I happen to love simple, unfussy cakes perfect for snacking.  As the name implies, this cake is fluffy and white and the perfect vehicle for maple frosting, or really any other kind of frosting.  When the weather warms up, it will be nice with the fresh flavors of berries and whipped cream.  It's easy and versatile.  The cake is delightful but the frosting is the star of the show.  A classic American buttercream made with butter and confectioners' sugar with maple flavor.  It's creamy, sweet, and flavorful.  A perfect antidote to a gloomy spring. 

Recipes originally from Betty Crocker's Cookbook, 1960 edition, very slightly adapted

For the Cake:

  • 4 egg whites
  • 1/4 c. softened, unsalted butter
  • 1/4 c. shortening
  • 1 1/2 c. sugar
  • 2 1/2 c. cake flour
  • 2 1/2 tsp. baking powder
  • 1 tsp. salt
  • 1 c. milk
  • 1 tsp. vanilla

Process:

Butter and flour a 9x13 cake pan and preheat the oven to 350.  Separate the eggs and beat the egg whites until stiff, then set aside while you make the rest of the batter.  Beat together the butter, shortening, and sugar until fluffy.  In a separate bowl, combine cake flour, baking powder, and salt.  In another container that is easy to pour from, measure the milk and vanilla together.  I use a liquid measuring cup for this step.  Add a third of the flour mixture to the butter/sugar mixture and give it a quick mix.  Add a third of the milk and mix.  Continue alternating dry ingredients and wet until everything is combined and beat until the batter is smooth, a minute or two.  Gently fold in the beaten egg whites, half at a time, resisting the urge to stir, as it will flatten the air out of the egg whites.  Pour into the prepared pan and bake until a toothpick comes out clean, 35-45 minutes.  Cool completely before frosting. 

For the Frosting:

First, a note about frosting - I almost never measure anything when making frosting.  I prefer a little bit of a mad scientist approach, adding ingredients as I go until I get the desired result.  I start with my fat, either butter or shortening or both, blend in flavoring, and add confectioner's sugar and milk until I get the consistency I'm after.  The frosting pictured is a maple buttercream and I will do my best to approximate the measurements, but play around a little until you get what you want.  You can't really go wrong with these ingredients.  If you find that you've added too much sugar and the frosting is sickeningly sweet, no problem, just add a little bit more softened butter and if needed, the smallest pinch of salt to cut the sweet.

  • 1/2 c. softened unsalted butter
  • 2 1/2 - 3 c. confectioners' sugar, depending on taste and consistency
  • 1-2 tsp. maple extract (a little goes a long way!  Start slow and add as needed)
  • OR  skip the extract and use 1/4 c. of pure maple syrup and adjust your sugar needs accordingly
  • 1/8 tsp. salt
  • Milk or cream

Process:

Beat softened butter with salt and flavoring.  Add 2 1/2 c. confectioners' sugar, about 1/2 c. at a time so it doesn't fly all over the place.  Don't worry if it looks dry and crumbly.  Add a couple of tablespoons of milk and mix together.  Continue adding milk, one tablespoon at a time, until you get the consistency you desire.  Taste.  Add more sugar if it wants to be sweeter, add more flavoring if it's not strong enough, add more milk if it needs to be creamier, add more butter if it's too sweet.  Don't stress about it.  It will come together and be delicious.  If you want a creamy consistency, beat on lower speeds to avoid adding lots of air.  If you prefer a more whipped icing, once you get the flavor you want, beat on high for several minutes to incorporate air into the frosting.  Spread liberally over the cake and enjoy!

-KB

Brown Sugar Scones on a Rainy Morning

April 7, 2016 Kate Bragg

Rainy morning with brown sugar scones

I love the occasional rainy morning, especially during transition seasons when the fog piles up in the valleys and over the river, and the clouds obscure mountains and hilltops.  They invite a certain coziness, a calmness, a quietness.  This particular morning was relatively warm, given the frigid spring we've been having here, and though the fog was thick and heavy, it was wonderful walking weather.  The rain fell more heavily later in the morning, inspiring me to stay cozy inside and bake a warming and indulgent breakfast treat - these brown sugar scones.  They come together quickly and easily, are lightly sweet with the rich flavor of dark brown sugar, and go perfectly with a cup of hot coffee on a rainy day. 

02_Brown_Sugar_Scones_Kate_Bragg.jpg
03_Brown_Sugar_Scones_Kate_Bragg.jpg
04_Brown_Sugar_Scones_Kate_Bragg.jpg
05_Brown_Sugar_Scones_Kate_Bragg.jpg
06_Brown_Sugar_Scones_Kate_Bragg.jpg
07_Brown_Sugar_Scones_Kate_Bragg.jpg
08_Brown_Sugar_Scones_Kate_Bragg.jpg
09_Brown_Sugar_Scones_Kate_Bragg.jpg
11_Brown_Sugar_Scones_Kate_Bragg.jpg
12_Brown_Sugar_Scones_Kate_Bragg.jpg

Brown Sugar Scones

Ingredients:

  • 2 c. flour
  • 1 Tbsp. baking powder
  • 1/2 tsp. salt
  • 1/4 c. dark brown sugar
  • 6 Tbsp. cold unsalted butter, cut into small cubes
  • 3/4 c. whole milk

Process

Preheat oven to 425 degrees.  Measure flour, baking powder, salt, and dark brown sugar in a medium mixing bowl.  Stir together so that the dry ingredients are well blended.  Add the cold butter and using either your fingertips or a pastry cutter (I use my pastry cutter), combine the butter with the dry ingredients until you have a mostly sandy consistency with some pea-sized lumps of butter left.  Pour the milk into the mixture and use a fork to stir together, just until all of the flour is dampened and the dough starts to come together.  Turn the dough out onto a lightly floured surface and gently press it together to form a disc about an inch thick.  Be careful not to knead this dough, as that will make it tough, and don't worry too much about getting the shape and height perfect.  Just eyeball it.  Place the disc onto a parchment-lined baking sheet and, using a knife or bench scraper, cut the disc like a pie into 8 equal slices.  Optional - lightly brush the tops with milk and sprinkle with course sugar.  Bake for approximately 15 minutes, until golden brown but not burnt on the bottoms.  Best eaten as soon as they are cool enough to touch, but will keep in an airtight container for a day or two. 

Enjoy! - KB

In Breakfast Tags Baking, Brown Sugar Scones, Scones, Rainy day
4 Comments

Pound Cake

March 22, 2016 Kate Bragg

Classic Pound Cake - from my Grandmother's recipe

My grandmother is well-known for her classic pound cake.  She's been making this cake since the early days of her marriage, when she and my grandfather were living in Arkansas.  Like so many of the great, classic recipes, this one has been able to withstand the test of time.  It's full of the rich flavors of butter and vanilla, sweet but not too sweet, hearty but not unpleasantly dense.  It works as a dessert, a snack, a breakfast treat, and pairs well with coffee any time of the day.  She gave me the recipe in the early days of my marriage, and it is now a part of my recipe repertoire. 

The only change I have made to the ingredients in the recipe, in all the years I've been making it, are to swap out the Oleo (It's a southern recipe) and use unsalted butter instead.  Because I can't seem to help myself, I have attempted several small changes to the recipe over the years, but none seemed to improve the recipe in any way - some actually detracted - so I'm leaving it well enough alone.  While there are almost no changes to the ingredients, I have added a significant amount of verbiage to the instructions.  When I received them, this is what they said: Mix well.  Beat until smooth with mixer.  Fold in beaten egg whites.  Pour into Angel Food Cake Pan.  Bake 1 hour, 15 min at 350.  Sufficient, but not necessarily instructive.  I've learned a few things along the way to optimize the cake-making experience, and below you will find my revised version of Grandma's classic pound cake recipe. 

Ingredients:


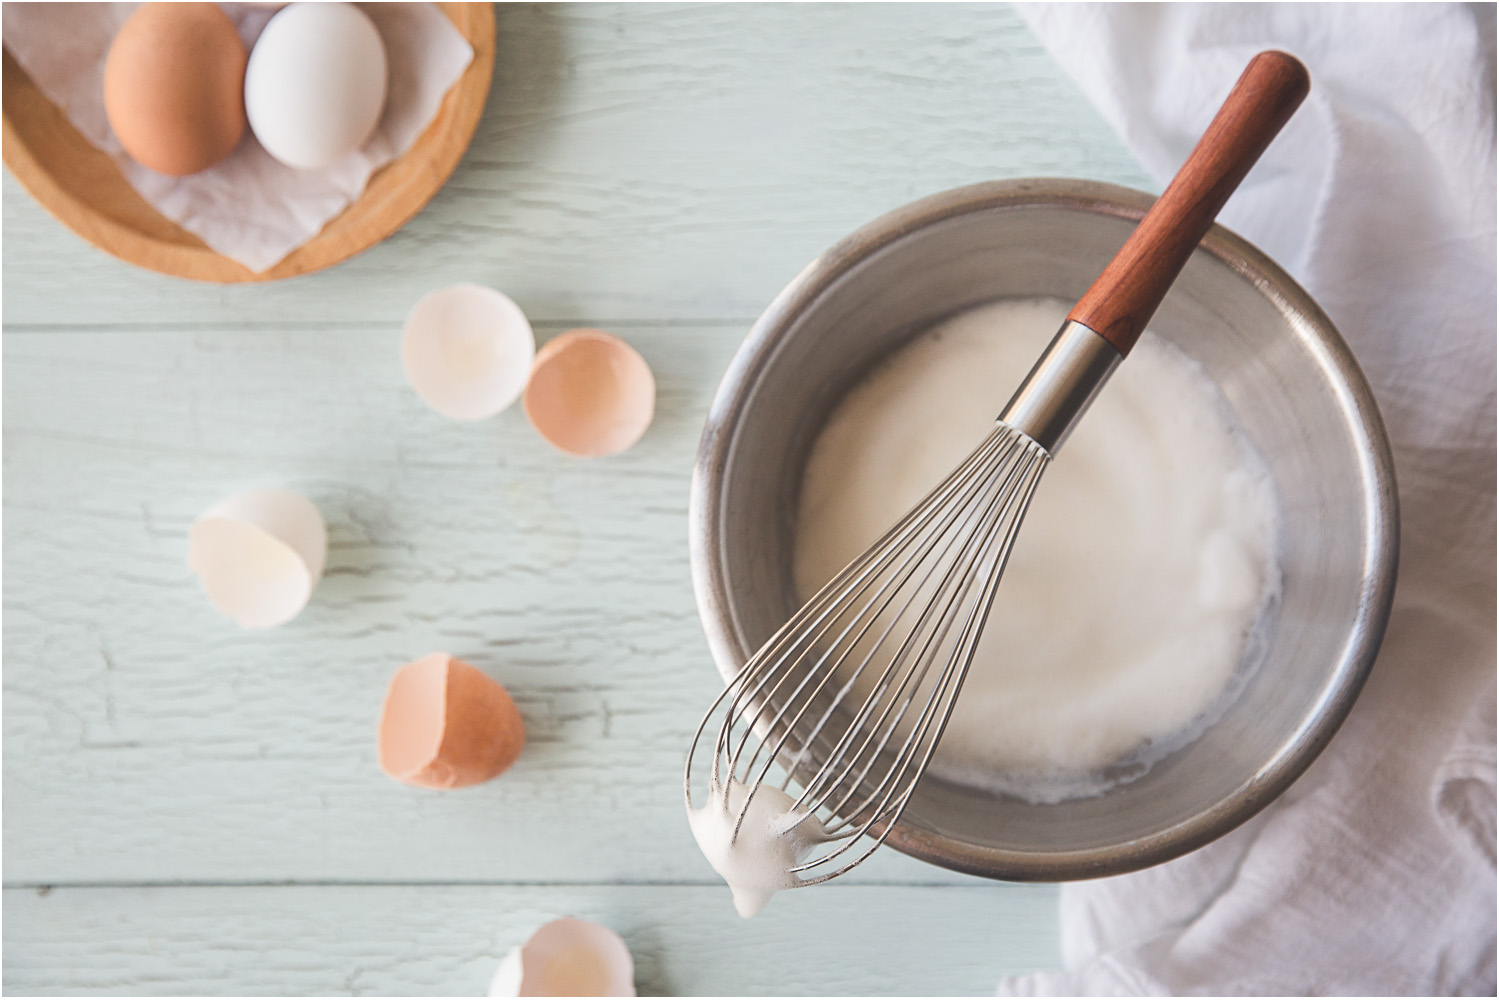
  • 5 eggs, separated, preferably room temperature
  • 1 c. unsalted butter, softened
  • 3 c. sugar
  • 1 tsp. vanilla
  • 3 c. all-purpose flour
  • ½ tsp. salt
  • ½ tsp. baking soda
  • 1 c. buttermilk

Process:

Heat oven to 350 degrees and prepare a tube or Bundt pan.  I often use a baking spray with flour in it, but you can butter and flour the pan if you prefer.

Whip the egg whites to the soft-peak stage, by hand using a whisk or with your mixer.  I use my mixer and often end up overbeating them but they still work just fine.  Set those aside while you make the rest of the batter. 

Using a stand mixer or handheld beater, cream together your butter and sugar.  There is a lot more sugar than butter, so don’t worry if this mixture doesn’t appear truly “creamy”.  Just make sure they are well combined, adding air as you go.  Beat in the egg yolks and vanilla until smooth and lightened in color. 

For proper cake technique, measure the flour, baking soda and salt into a separate bowl and add them to the batter in thirds, alternating with the buttermilk.  For improper, less dish-use, lack-of-technique, add the flour, baking soda, salt and buttermilk to the batter and beat it all until smooth.  There is a difference in the final texture – you will have a more even texture and lighter cake if you alternate adding your flour and buttermilk.  I am usually not that patient and the difference in texture is not enough to compel me to follow proper technique here.  I am usually making this cake for my family to enjoy, and they don’t complain if the crumb is not perfectly even.  So I dump it all together and mix until it’s nice and smooth.  The batter will be very thick.  Fold in a third of the egg whites, trying to resist the temptation to stir them in.  They will fold in, even if at first it seems impossible because the batter is so thick and the whites are so light.  Gently fold and fold.  Then add another third of the whites and repeat.  Repeat again with the final third until they are all folded in and no white streaks remain.  The whipped egg whites are the primary leavening agent for this cake, so if you flatten them by stirring, you will end up with a flat, too dense cake. 

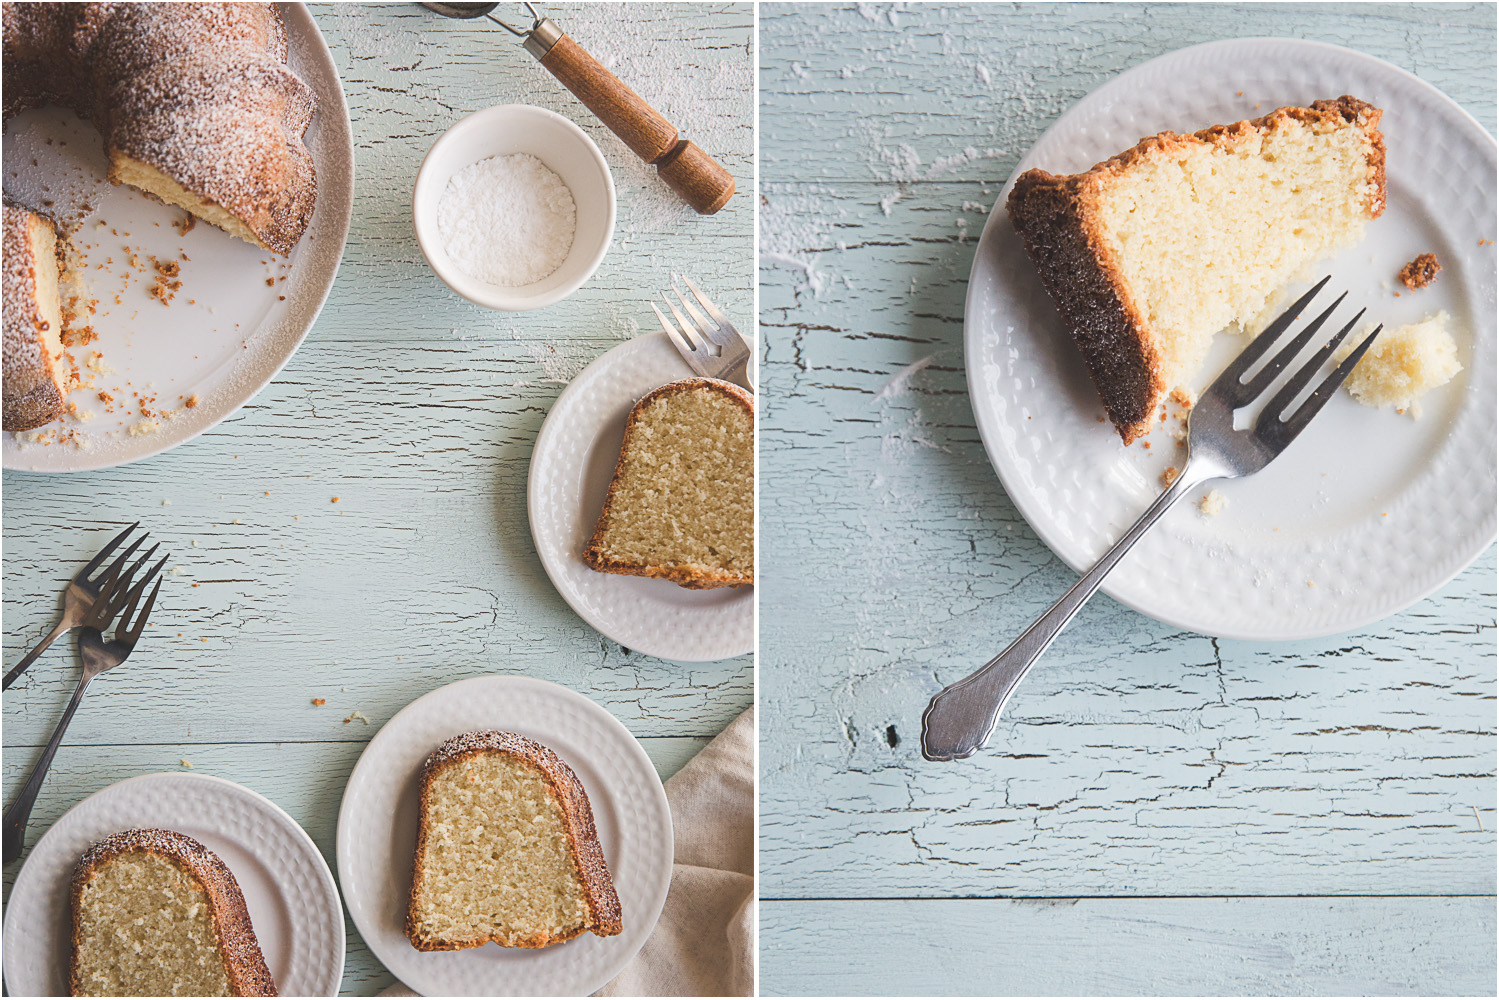
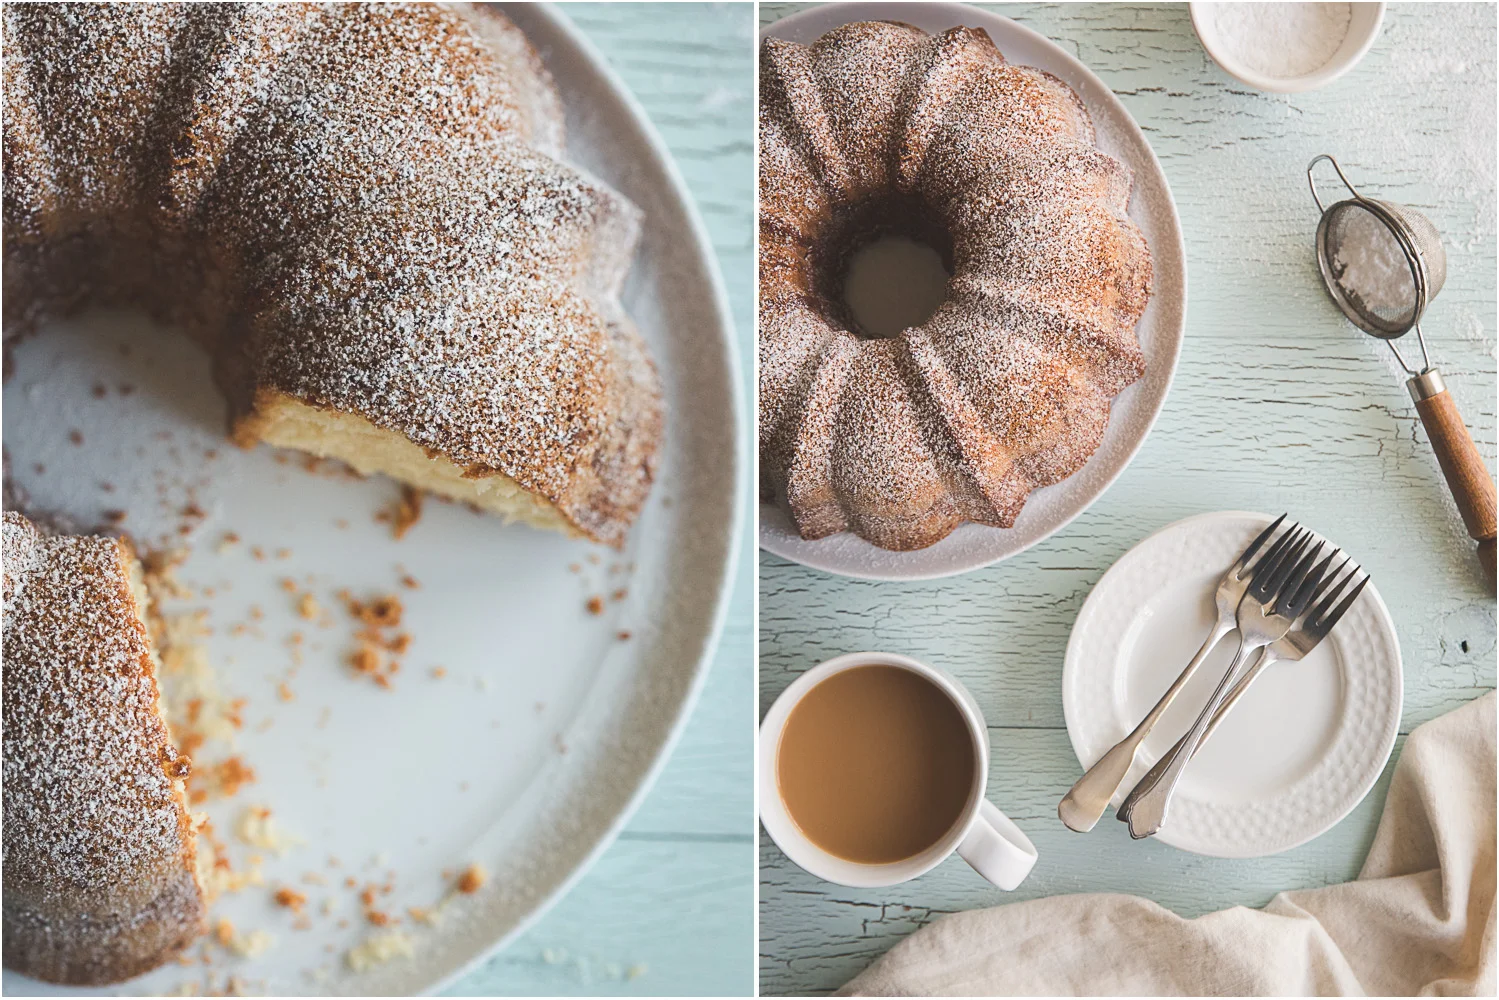
Pour the batter evenly into the prepared pan and bake for approximately an hour.  The cake may take more or less time, depending on your oven.  I begin checking the cake at the 50 min. mark, for good measure.  The cake is done when the top is springy to the touch and doesn’t sound like crackling tissue paper when you touch it.  The top may look crackly, and that’s good, but if it gives under your touch and is squishy instead of springy, it wants to bake a little longer.  It will turn a dark, golden brown as it bakes.  When it’s done, remove it from the oven and allow it to cool 5 minutes in the pan, then invert the pan onto a cooling rack.  If the cake slides right out, remove the pan.  If it doesn’t, let it sit for a little while, upside down on the rack, and eventually the cake will drop right out onto the rack.  Let the cake cool on the rack for as long as you can keep people away from it.  We usually make it about an hour but a couple of hours is best, so that the cake is completely cool before cutting it.  Once completely cool, wrap tightly with plastic or store in a cake dome.  The cake will keep for a few days and also freezes nicely. 

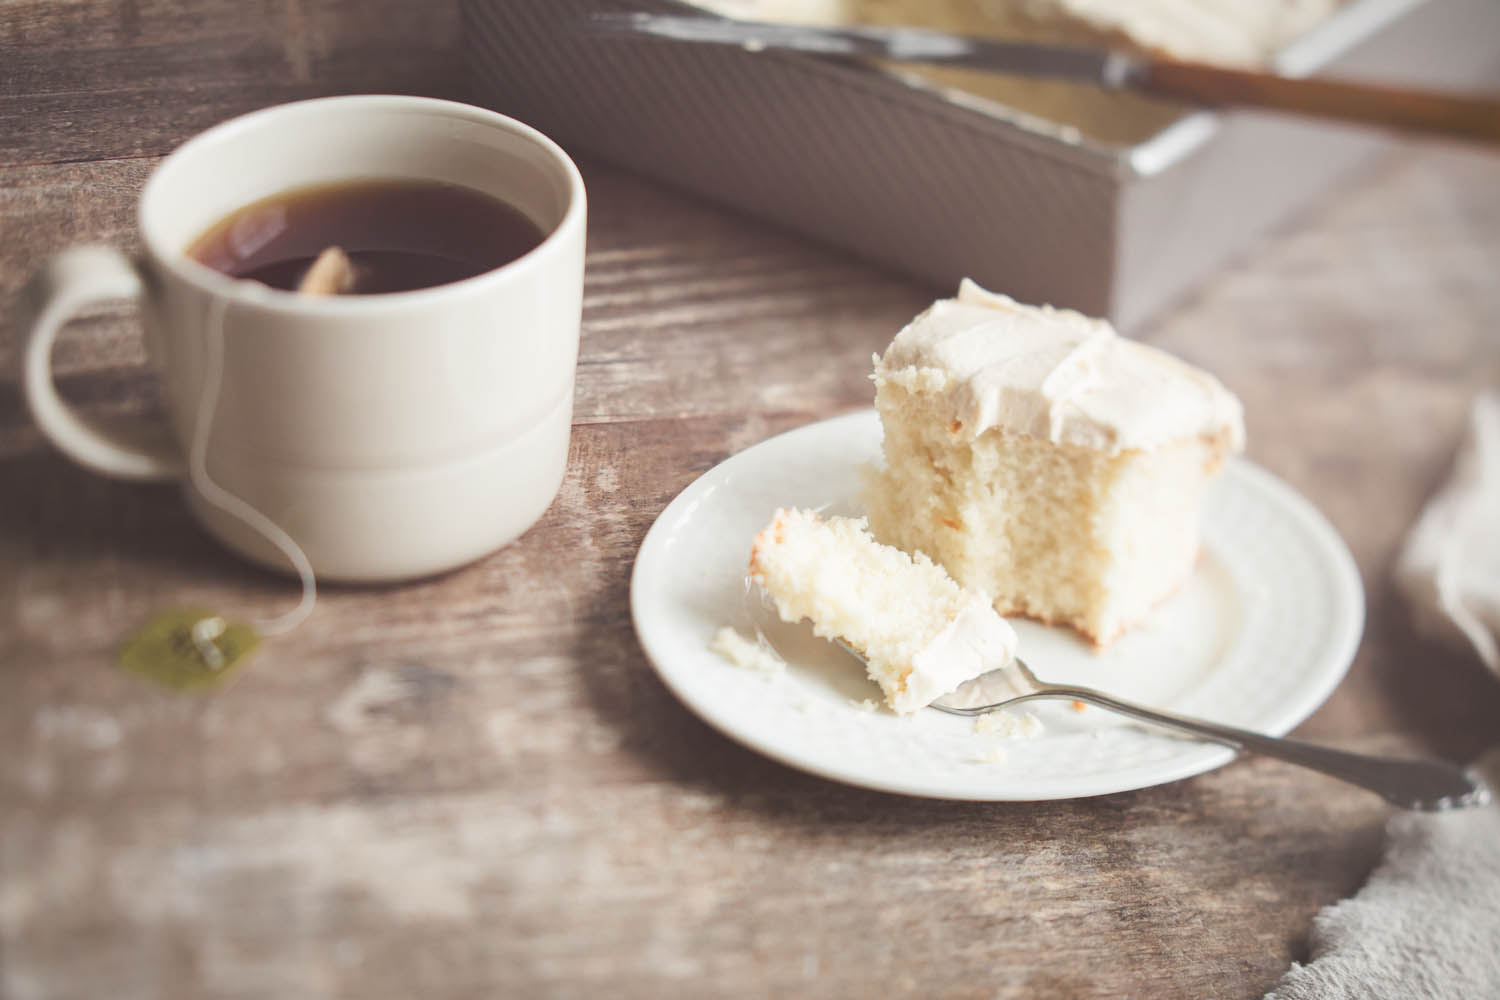
This cake is great as is, but is also a good vehicle for jam, whipped cream, berries, curd, or really anything you want to put on it. 

Enjoy!

-KB 


Comment

Kannelbullar - More Photos

March 12, 2016 Kate Bragg

Today I have a few more Kannelbullar photos to share.  Just a few days after I shot the photos for the recipe post, my family requested another batch and I happily complied.  I thoroughly enjoy making them, filling the house with the scents of cinnamon and cardamom, adding to the overall coziness of a relaxed day at home.  I couldn't resist the opportunity to shoot a few more photos of them, as they are so photogenic, styled a little differently this time. 

02 Kannelbullar Photo.jpg
03 Kannelbullar Photo.jpg
04 Kannelbullar Photo.jpg
05 Kannelbullar Photo.jpg
06 Kannelbullar Photo.jpg

Enjoy! - KB

Kannelbullar (Swedish Cinnamon Buns)

March 11, 2016 Kate Bragg

It's safe to say that I am enamored with all things Scandinavian.  Their take on cinnamon buns is no exception.  Kannelbullar, Swedish cinnamon buns, are one of my favorite things to bake.  They are a perfect everyday kind of treat - cheerful on a bright and chilly March morning, comforting on a cold November afternoon, and delightful every day in between.  They are not at all difficult, though they do require a bit more effort than American-style cinnamon buns, only because you add the step of forming them into knots and egg-washing them before baking.  Making them is an enjoyable kind of work and the payoff at the end is well worth the extra effort.  Like many Kannelbullar recipes, I like to add cardamom to the dough, which gives the flavor extra depth and compliments the cinnamon in the filling.  The dough is lightly sweet and the filling is rich with butter and cinnamon.  They are traditionally topped with Swedish pearl sugar, but when I first made them I didn't have any on hand and so I used a sparkling sugar that I usually use to top muffins.  I liked the end result, so now I regularly use sparkling sugar for my topping.  The buns are pretty, even if mine always seem to be slightly unruly and not especially uniform.  There is perfection in imperfection.   

My recipe is very slightly adapted from this wonderful video on how to make Kannelbullar.  It yields 8-10 buns, depending on the size of your final log of dough when you slice it to form the buns.  I never bother to measure the dough when I roll it out.  I eyeball it as I go, so I am prone to variance in the final number of buns. 

Avery was very interested in the cinnamon bun-making process

Avery was very interested in the cinnamon bun-making process

Ingredients:

For the buns:

  • 1 c. lukewarm whole milk (add a little cream or butter to low-fat milk if needed)
  • 5 Tbsp. butter
  • 3 ½ c. flour
  • 1 ¾  tsp. yeast
  • 1/3 c. sugar
  • 1+ tsp. cardamom (add more than 1 tsp. if you like)

For the filling: (measurements are approximate)

  • 1/3 c. butter, softened
  • 1 Tbsp. cinnamon
  • 1/3 c. sugar

Topping (optional):

  • 1 egg
  • Course sugar or Swedish sugar pearls

Process:

Heat the milk and butter together in a small sauce pan, or in small bowl on low power in the microwave, until the butter is melted.  Remove from heat and let the butter and milk cool to lukewarm.  Mix together the flour, sugar, yeast and cardamom in a large bowl.  Pour the melted butter and milk mixture into the flour mixture and stir to combine.  The dough will likely seem quite wet but unless it is really more like batter than dough, avoid adding extra flour.  I use my hands at this point, as the video suggests, so I can feel the dough and get the consistency I want. I begin to work the dough while it is still in the bowl.  It should feel very soft and a little sticky at first, but as you work it the stickiness will start to ease up.  If it is too sticky, add a tablespoon of flour at a time but be careful not to add too much.  Too much flour makes the dough hard and dry when the buns are baked, instead of staying nice and soft.  When the dough has lost its stickiness, I dump it onto the counter, without extra flour, and knead it for about 10 minutes.  If you notice the dough is fighting you and not becoming stretchy, let it rest, covered, about 10 minutes.  This will let the dough relax and when you go back to it, it will be softer and more compliant.  Place the dough in a lightly greased bowl.  Cover and allow to rise until doubled, one to two hours. 

Once the dough has risen, remove from the bowl.  Knead the dough a few times, let rest a few minutes covered, and then roll into a large rectangle to spread on the filling.  Measurements for the filling are approximate.  I never measure my filling.  I start with about a half a stick of softened butter and spread it on the dough using a butter knife or offset spatula.  I sprinkle sugar over the butter and the cinnamon over that.  My family prefers the buns to be a little bit light on the cinnamon, but use as much as suits your tastes.  Leave a small margin at the edges of the rectangle so that it will seal when rolled up.  From here, you can either roll the rectangle into a log and slice, like classic American cinnamon buns, or you can shape them like Swedish buns.  To shape them in the Swedish style, fold your rectangle the long way in thirds, like folding a letter.  Use your rolling pin to press the layers of the “letter” together and flatten slightly.  Slice the new, thin rectangle into 2” wide sections and slice each section in the middle, about ¾ of the way up the piece of dough, like you are making legs.  (See photo.)  Stretch and twist each of the “legs” and form into a knot with the twisted parts on top.  This is not as difficult as it sounds and is very forgiving, so be a little creative and don’t worry about having perfect form.  Place each formed bun onto a parchment-lined baking sheet, leaving a couple of inches between buns as they spread in the oven,  and allow the buns to rest and rise for about ½ an hour. 

Heat oven to 450 degrees.  If you like, you can brush each bun with an egg wash (crack an egg and break up with a fork, then use a pastry brush to apply the egg to the tops of the buns) and sprinkle with course sugar or Swedish pearl sugar.  Bake buns for 12-14 minutes, keeping a close eye on them.  When they are golden brown and baked through, remove from oven and let cool on a rack until they are cool enough to eat.  Enjoy warm or at room temperature.  Buns are best eaten the day they are baked, but will keep for a day or two. 

Enjoy!

KB

2 Comments

Classic Chocolate Chip Cookies

March 4, 2016 Kate Bragg
Classic Chocolate Chip Cookies

Classic Chocolate Chip Cookies

Classic Chocolate Chip Cookies - Every home baker needs a good classic chocolate chip cookie recipe in her repertoire.  It has to be the kind of recipe that you can make on any given weekday afternoon, whether for the family, the whole soccer team, or just for yourself.  For me, the classic cookie I crave is soft in the middle, crispy on the edges, full of chocolate, and flavorful through and through.   

Chocolate Chip Cookie Dough, chopped semi-sweet chocolate

Chocolate Chip Cookie Dough, chopped semi-sweet chocolate

I've been perfecting my recipe for as long as I have been baking, which is a long time.  I have tried countless recipes, tweaking elements here and there to get the result I was after.  My current go-to recipe is a combination of several of my favorites including these, from Jacques Torres found on Martha Stewart, these from Whipperberry, and these from the New York Times.  The keys to this recipe are to use both semisweet and milk chocolate, so that you get a bit of caramel undertone in the cookie, add at least two teaspoons of good vanilla, use a full teaspoon of salt, use a little cornstarch if you aren't going to eat them immediately after baking, make them large for best texture, and, most importantly, let the dough rest in the fridge for a minimum of 24 hours before baking.  If you can't wait 24, try to wait for at least 3.  This lets the flour fully absorb the fat in the butter and gives the flavors a chance to come together and ripen. 

Though I like to make these cookies big, they work well in a small size if you need to feed a crowd, or just don't want to make large cookies. 

Ingredients:

  • 2 1/2 sticks of unsalted butter, softened to room temperature
  • 1 c. sugar
  • 1 1/4 c. dark brown sugar
  • 2 eggs
  • 2 tsp. vanilla extract
  • 3 1/2 c. all-purpose flour
  • 1 1/4 tsp. baking soda
  • 1 1/2 tsp. baking powder
  • 2 tsp. cornstarch (optional)
  • 1 tsp. salt
  • 2+ oz. chopped milk chocolate or milk chocolate chips (use as much as you like)
  • 8+ oz chopped semisweet chocolate or chocolate chips (use as much as you like)

Directions:

Cream together softened (not melted) butter and sugars.  Add eggs, one at a time, beat to incorporate.  Add vanilla and beat until well-combined and fluffy.  Measure all dry ingredients, except chocolate, and add to the bowl.  Mix slowly until thoroughly combined, but don't over mix.  Add milk and dark chocolate to the dough and mix until evenly distributed.  Store dough, tightly sealed in plastic or parchment, in refrigerator for at least 24 hours.  This dough gets better with age, so the longer the better.  It will keep for up to a week, or more, in the fridge. 

When ready to bake, heat oven to 350⁰ and if you have a convection option, I recommend using it. 

These cookies have the best texture if they are made large, the size of a large cookie scoop or ice cream scoop, but small cookies work well too.  I use a scoop to portion the dough so I have similarly-sized cookies.  You can also roll the dough into a log before placing in the refrigerator for slice and bake ease.  Place balls of cookie dough (roll them slightly if they are not shaped well) onto ungreased cookie sheet.  Large cookies will bake for 13-14 minutes, small for 9-10.  They should be turning golden brown on the edges but still very soft, under-baked, in the centers.  The tops should be browning and set, not raw, but still soft.  The cookies will continue to bake and set for a few minutes when they are out of the oven, so it is best to pull them out while under-baked and a bit puffy or they will turn hard and lose their chewy center.  Leave them to cool on their pan for about 5 minutes before placing on a cooling rack.

These cookies are best eaten fresh but will keep in an airtight container for two to three days.  The cornstarch in the dough will help them to maintain their soft, chewy interior if you don’t plan to eat them right away.  I like to make this dough and keep it in the refrigerator to have on hand so I can bake up a few cookies at a time.  You can also portion out the dough and freeze it so you can take cookie dough balls out of the freezer and bake them up at any time. 

Enjoy! - Kate


In Cookies Tags Chocolate chip cookies, Baking
Comment

Welcome!

March 2, 2016 Kate Bragg

Welcome to my blog!  I am passionate about all things photography and baking.  Here you can expect to find recipes and images of my latest baking adventures along with some lifestyle and still-life images.  Though this image was taken in the fall, with apples harvested from my family's orchard, berries foraged on a walk in the woods, and my trusty apron, it's a good beginning to my journey here.  I hope to see you back here again soon! 

In Still Life Tags Still Life, Apples, Fall
Comment
← Newer Posts

Don't miss a thing!

Sign up to get access to my FREE resource library and be the first to know about any goings-on around here.

Completing this form will add you to my email list. We respect your privacy and you may unsubscribe at any time.

Thank you! I'm so glad to have you here! 

©Kate Bragg 2024

Privacy Policy and Terms of Use

Powered by Squarespace